Most people buy the rod last. They book the trip, pack the tackle box, and grab whatever packable rod is on the shelf two days before they leave. Then they get to the water, extend the thing, and find out the guides do not line up, the reel seat flexes under load, and the rod casts like a broom handle. A travel fishing rod setup is not complicated, but it has a sequence, and skipping the sequence is why so many packable rods fish badly.
I have been rigging rods for paying clients for 24 years, most of that running charters out of Destin, Florida. My knees ended the charter side of it. Now I run a tackle shop and spend my days doing the same thing I did on the boat: checking how a rod loads, how it recovers, and whether I would hand it to somebody who paid me to put them on fish. Half the rods I fix at the counter were never broken. They were assembled wrong.
Here is the full setup, start to finish, plus the two rods I would start with if you are building a packable kit from nothing.
Why you should trust me
I have spooled more line than most factories, and I keep a logbook on every rod that comes through the shop. Not a spreadsheet of marketing specs, a logbook of action curves: where the rod bends under a static load, where it stops bending, and how it comes back. I test every rod the same way. A full season of real fishing, a backbone test against a drag setting most anglers will never use, and a casting check with both a beginner and an experienced caster on the same rod.
That last one matters more than people think. A rod that casts well for me can be miserable for someone who has never loaded graphite before. If a rod only works in expert hands, it is not a good rod. It is a good rod for me.
How I judge a packable rod before it goes on the shelf
Four things, in order.
Action first. How the rod loads and unloads is the whole game. Power ratings are marketing words. A fast action bends in the top third, a moderate action bends through the middle, a slow action bends deep into the butt. For travel rods, moderate is usually the honest choice because you are casting a range of lure weights with one rod, not one lure all day.
Backbone second. The mid-section is what fights the fish. Grab the rod and pull the tip down while watching the mid-section. If the bend moves smoothly with no flat spot and no hinge, the backbone is there. If the rod folds in one spot, it will break there.
Guides third. Cheap guides groove. Once a ring grooves, it shreds line and you lose fish on the cast, not the fight. Run a cotton swab around the inside of every ring. If it catches fibers, the ring is done.
Reel seat fourth. A wobbly reel seat on a 20-pound fish is a disaster waiting to happen. Mount a reel, tighten it down, and try to rock the reel side to side. Any movement means the seat is a problem.
The two rods I would build a travel setup around
These are the two I would put in front of a customer who wants one rod case, one reel, and a setup that survives a week of airline travel and saltwater.
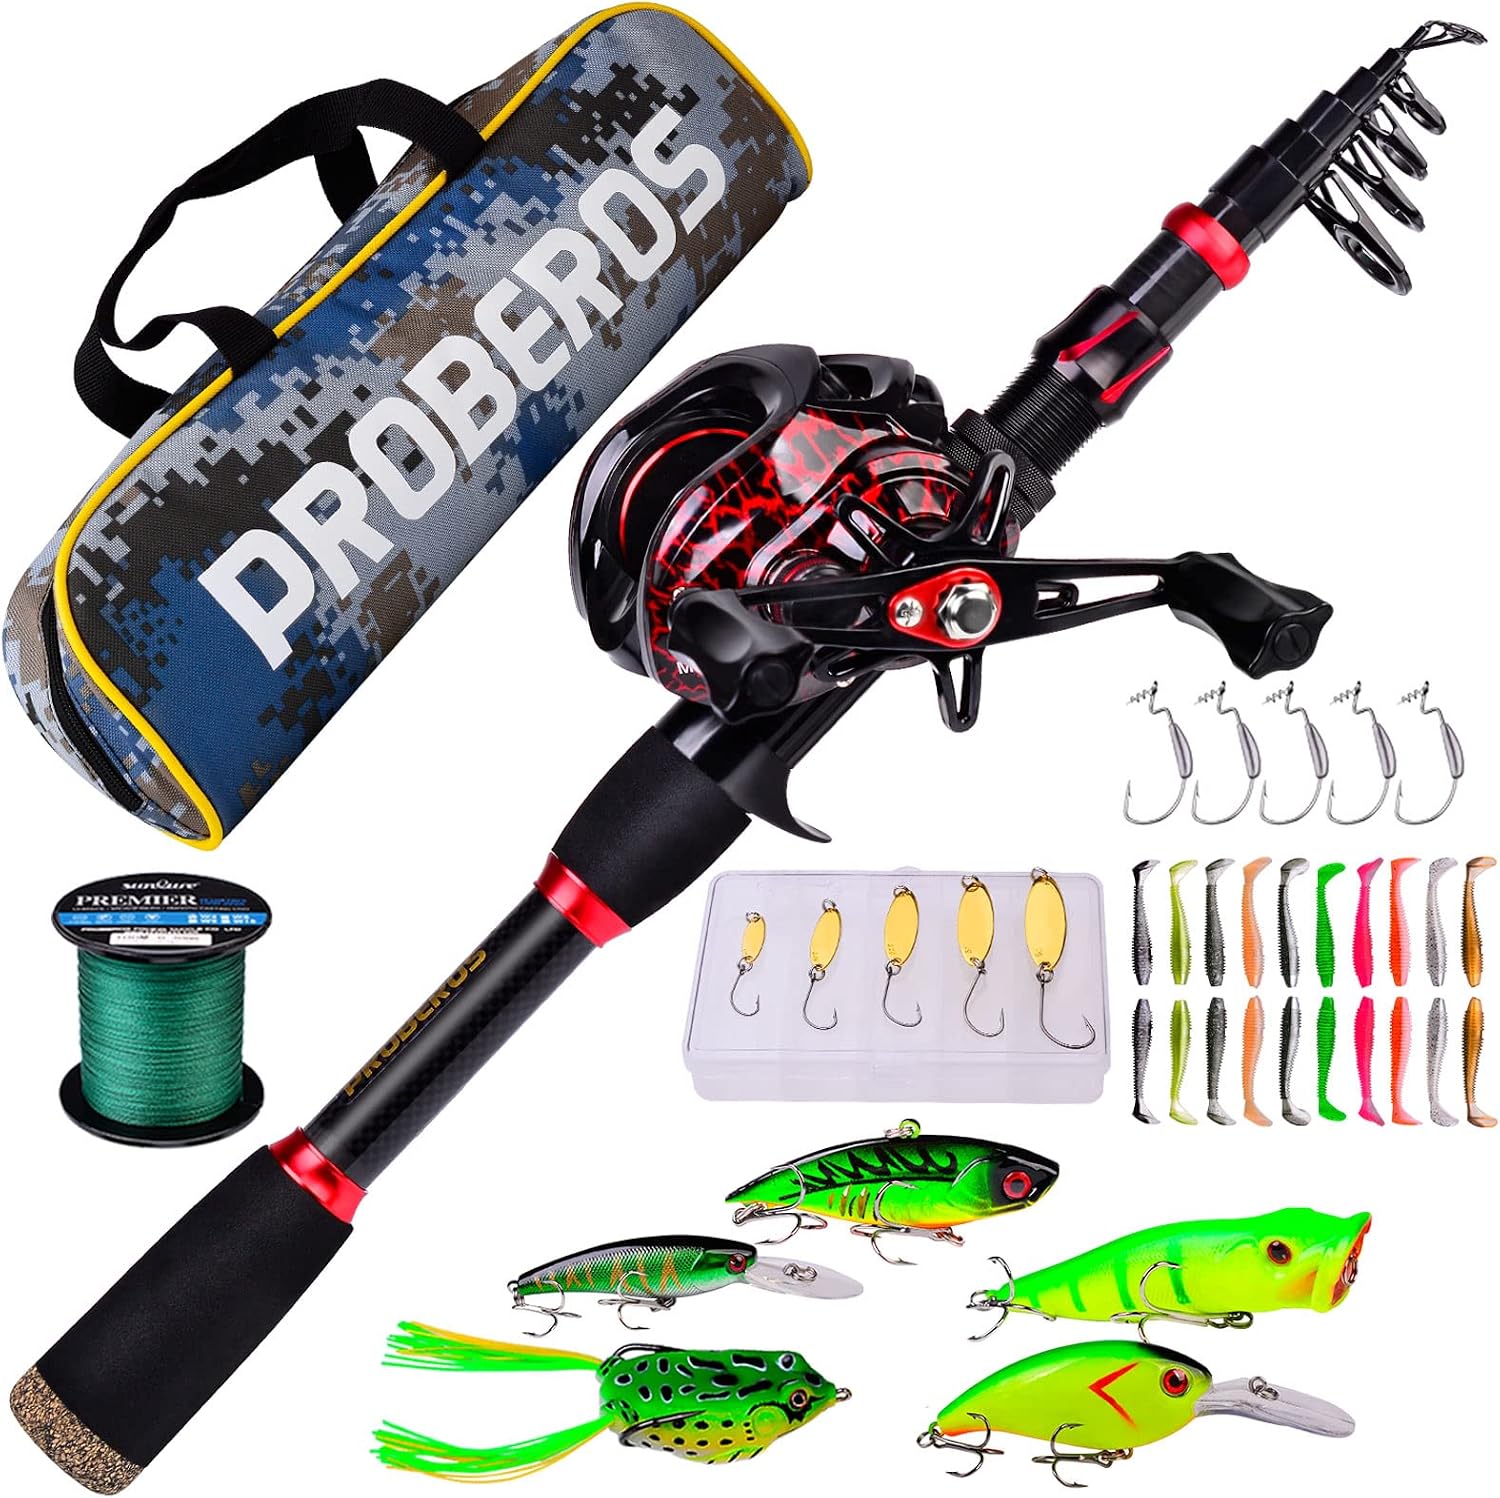
Budget pick: Fishing Rod and Reel Combo, 6.9ft Carbon Fiber Telescopic Fishing Pole with Spinning/Baitcasting Reel Combos, Sea Saltwater Freshwater Ice Bass Fishing Tackle Set Fishing Rods Kit
 Visit on Amazon →
This is the rod I hand to someone who is flying somewhere and does not want to check a rod tube. It breaks down into a package short enough for a carry-on or a daypack, and it comes as a kit with the reel, which removes a decision for a beginner. The carbon fiber blank gives you a reasonable fast-to-moderate action for the price, and the telescopic design means no ferrules to lose.
The caveat with any telescopic rod is the joints. There are more of them than on a two-piece, and every joint is a place where the rod can twist or slip under load. Extend each section with a firm twist, not a shove, and re-check them after your first ten casts. The reel that ships in a combo is a starting point, not a forever reel. Fish it a season, then decide if you want to upgrade the reel and keep the rod.
Flaws but not dealbreakers: Telescopic rods flex differently than one-piece rods, and the very tip section is the most fragile part of any packable rod. Do not jam it into a car trunk or stand it in a corner where a door can catch it.
Anyone who wants one bag, one rod, and a freshwater or light saltwater setup for a trip should start here.
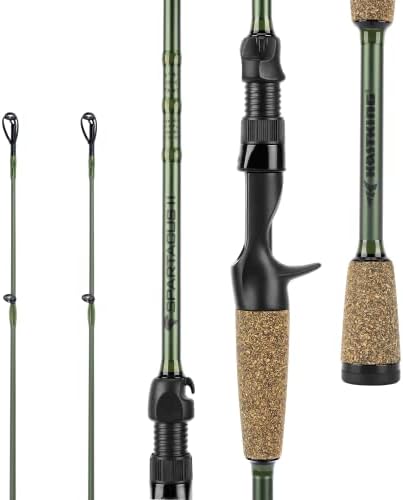
Upgrade pick: KastKing Spartacus II Twin-Tip Spinning & Casting Fishing Rods
 Visit on Amazon →
A twin-tip rod gives you two rods in one tube, which is the single smartest thing you can do when you are limited to one rod case. One tip is built for spinning gear, the other for casting gear, so you can switch techniques without switching rods. That flexibility is worth more on a travel trip than any single spec on the blank.
The reason I put this above the kit rod is the reel seat and guide train. When you are spending real money on a packable rod, the hardware is where the money should go, because hardware is what fails. Check the seat with a mounted reel before your trip, check the guide rings with a cotton swab, and check that the tip sections seat fully with no gap at the ferrule.
Flaws but not dealbreakers: Two tips means two things to keep track of. Label them or store them in separate sleeves, because a spinning tip on a casting reel fishes badly and it takes most people an hour to figure out why.
Anyone who wants one travel rod that covers both spinning and casting, and who is willing to pay for better hardware, should look here first.
The actual setup, step by step
This is the sequence I run at the counter. It takes about 20 minutes and it prevents almost every problem I see on the water.
Step one: Inspect before you assemble. Wipe each section with a dry cloth and look at the joints. Grit in a ferrule or a telescopic joint is what wears graphite down over a season. If you see a crack, a chip, or a groove in a guide ring, stop. That rod goes back.
Step two: Extend and seat the sections. On a telescopic rod, pull each section out and twist it a quarter turn to seat it. On a two-piece or twin-tip, push the ferrule together with a straight, firm push and align the guides as you go. Never seat a ferrule by twisting the tip, and never push a ferrule together with the rod bent. If a ferrule will not seat, clean it. Do not force it.
Step three: Check guide alignment. Sight down the rod from the butt like a rifle barrel. Every guide should sit on the same line, on the underside of the blank. A guide that is 15 degrees off will torque the rod on every cast, cut distance, and wear your line. This is the single most common assembly mistake I see.
Step four: Mount the reel and test the seat. Seat the reel foot fully into the seat, tighten the locking nut by hand, and rock the reel side to side and up and down. Any movement means you need to reseat it or the seat is failing. Do not overtighten. You want snug, not crushed.
Step five: Run the line through the guides in order. Start at the butt guide and work toward the tip. Count the guides as you go, because skipping one is easy in low light and it will destroy a cast. If the rod has a tip-top that looks different from the rest, that is normal.
Step six: Spool and set drag. Fill the spool to within about an eighth of an inch of the lip. Underfilled spools cost you distance, overfilled spools throw loops. Then set the drag by pulling line off the spool by hand. It should come off smoothly with steady resistance, not in jerks. On a travel rod, set it a little lighter than you would at home, because you do not know what you will hook.
Step seven: Cast it before you fish it. Take ten casts in the yard, a park, or off a dock. Start short and work out. Listen for a ticking sound on the cast, which usually means a guide ring is damaged or a joint is loose. Watch where the line lands. If it drifts consistently left or right, check guide alignment again before you blame your casting.
Step eight: Dry and store it the right way. Salt water kills rods that get put away wet. Freshwater rinse, wipe down, let it dry fully extended before you collapse it. Store it in a sleeve, not loose in a bag where it can bang against a reel.
Field fixes for the first two days on the water
Telescopic joints loosen as the rod warms in the sun and as you cast. Re-seat them every hour or so on the first day, then you will know which joints move.
If a joint keeps slipping, the fix is not tape. Take it apart, wipe both surfaces clean with a dry cloth, and reseat. Tape changes the fit and can crack a section when you collapse the rod.
If a ferrule starts clicking on the cast, it has loosened. Reseat it before the next cast. Fishing a loose ferrule is how tips break.
If the line starts fraying above the knot, run your fingers down the guides. Frayed line almost always points to a grooved or cracked ring, and the ring is cheaper to fix than the fish you will lose.
Rods people ask me about instead
Anglers at the counter ask about St. Croix constantly, and they should. The action is consistent rod to rod and the warranty is the best in the business. G. Loomis makes the best high-end rods I have ever cast, and the sensitivity is unreal, but you are paying for it. Ugly Stik is still the value king for a rod you plan to abuse. Daiwa's Tatula line is the best mid-range bass rod for the money, and Penn builds the conventional saltwater rods like tanks, which is exactly what saltwater demands.
None of those are travel rods, and that is the point. If your priority is a rod that packs into a carry-on, the two above are the right shape of tool. If your priority is a tournament-grade bass rod that lives in a rod locker, that is a different article.
What this all costs to run for a season
The kit rod keeps the entry cost low because it includes the reel. The twin-tip costs more up front and saves you later, because you are not buying a second rod for casting gear.
The real cost is not the rod. It is line, and it is time. Replace line once a season on a rod that lives in saltwater. Rinse it every trip. Check the guides every few trips. A packable rod that gets that treatment will fish for years, and a rod that does not will fail in the middle of the one week you actually get on the water.
The short version
Buy for the fish you actually catch, not the one in the catalog photo. Set the rod up in order: inspect, seat, align, mount, run the line, set the drag, cast it, then dry it. Re-check the joints on the first day and check the guides with a cotton swab once a month.
That is the whole job. The rod is a tool. The fish is the review.